2 Kayaks - Stitch and Glue
A small project to get the shed used to boats - it has only ever built bulldozers, so its got a bit to get used to.
I always felt it was just as easy to build two canoes as one. You have to wait for the epoxy to dry, so you might as well repeat the steps on another one rather than waste a day while the epoxy goes off.
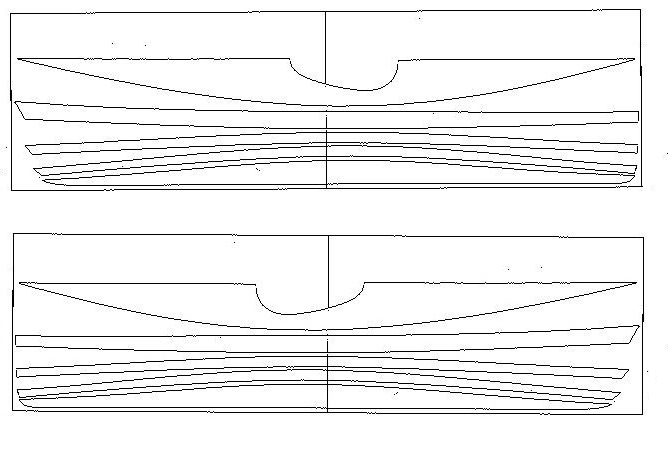
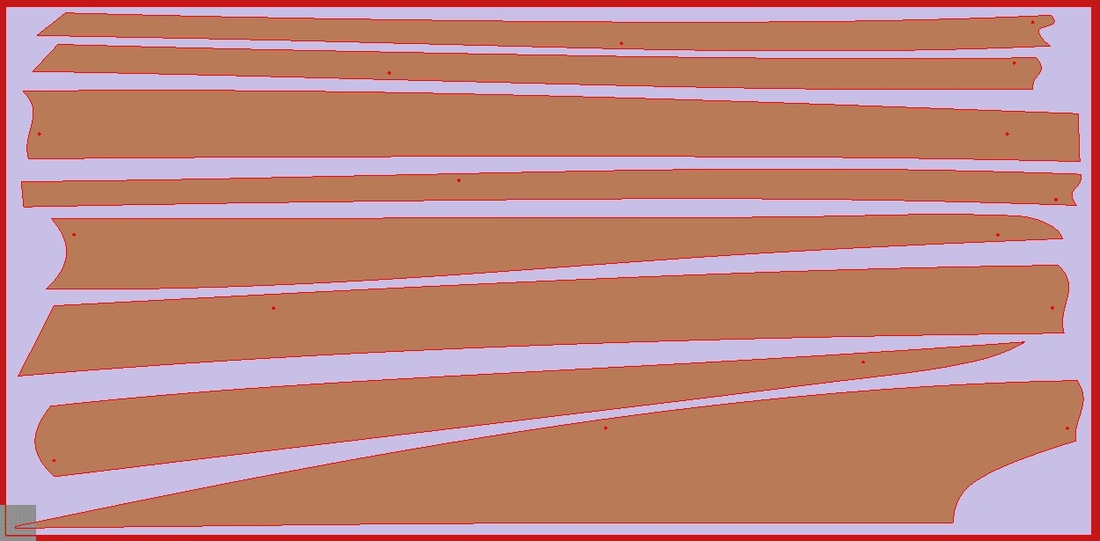
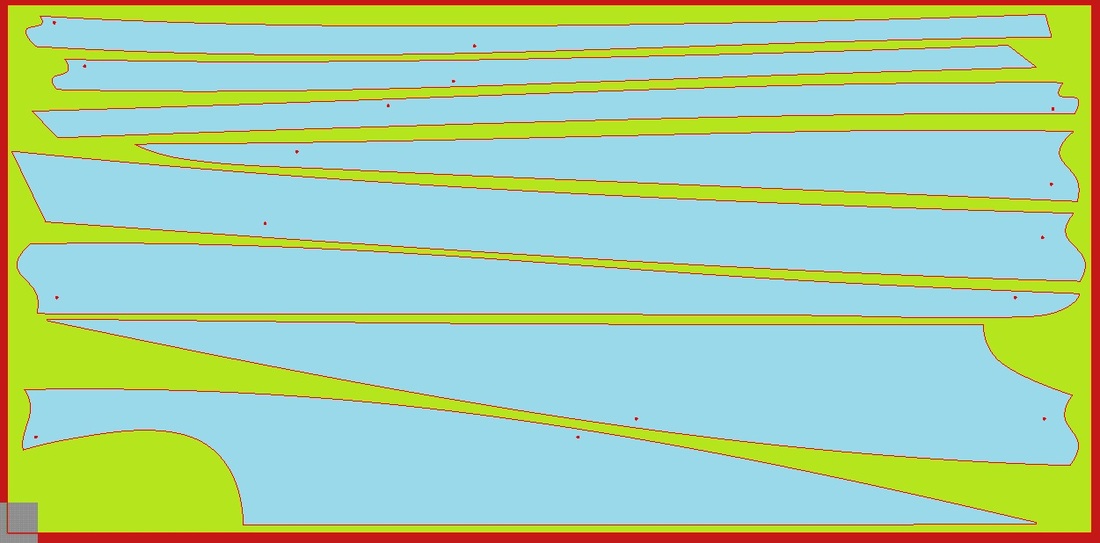
According to the plans, we needed 4 sheets of ply (Pic 1) , to build one canoe. And we had to cut it by hand to tolerances of 1/32 inch. This would have been a considerable challenge in the lofting and hand cutting stage, and really not worth the chance of spoiling a lot of expensive plywood. So, I contacted my not so local design Guru - Florin, and he organised some CAD files.
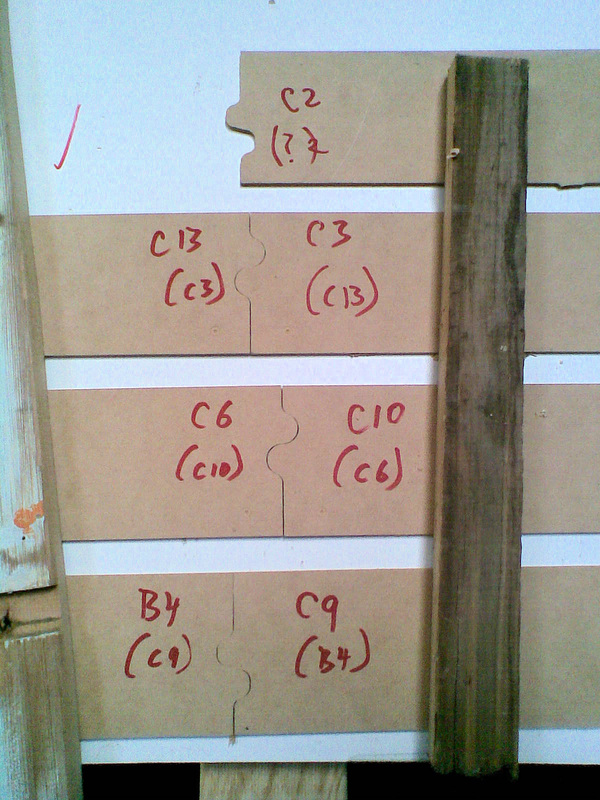
Not only did they convert to CAD, but we could get TWO Kayaks from FIVE sheets of Plywood instead of eight ! To make life even easier, Florin put unique matching shapes at the join lines on each plank, so that the different planks couldnt be confused with each other. He also put small marks on each part, to identify the ply face, and also to allow lining up the two ends of the plank, with a string.
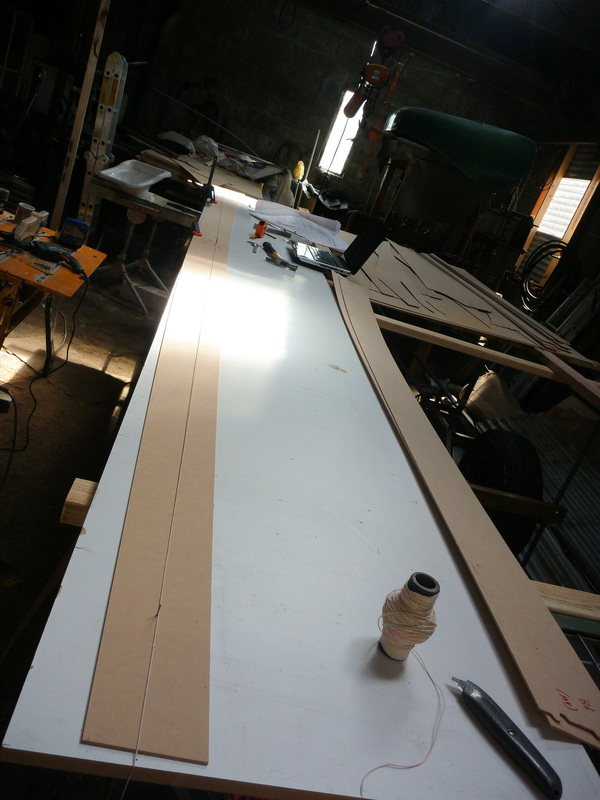
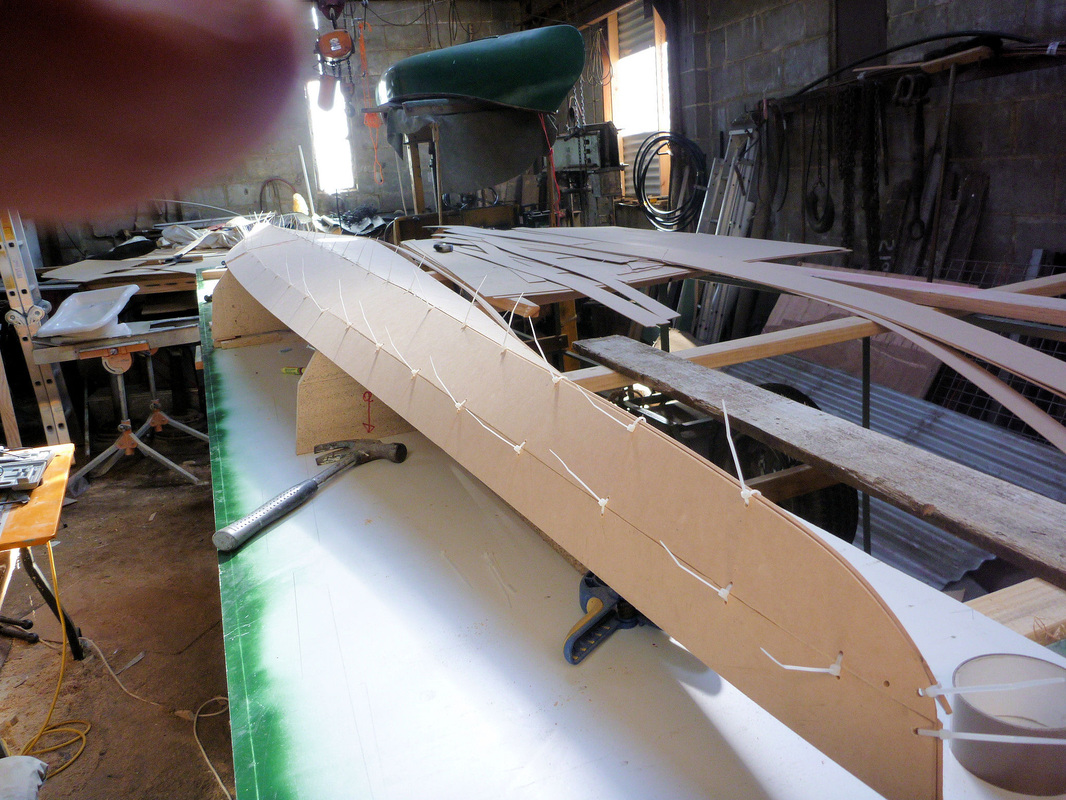
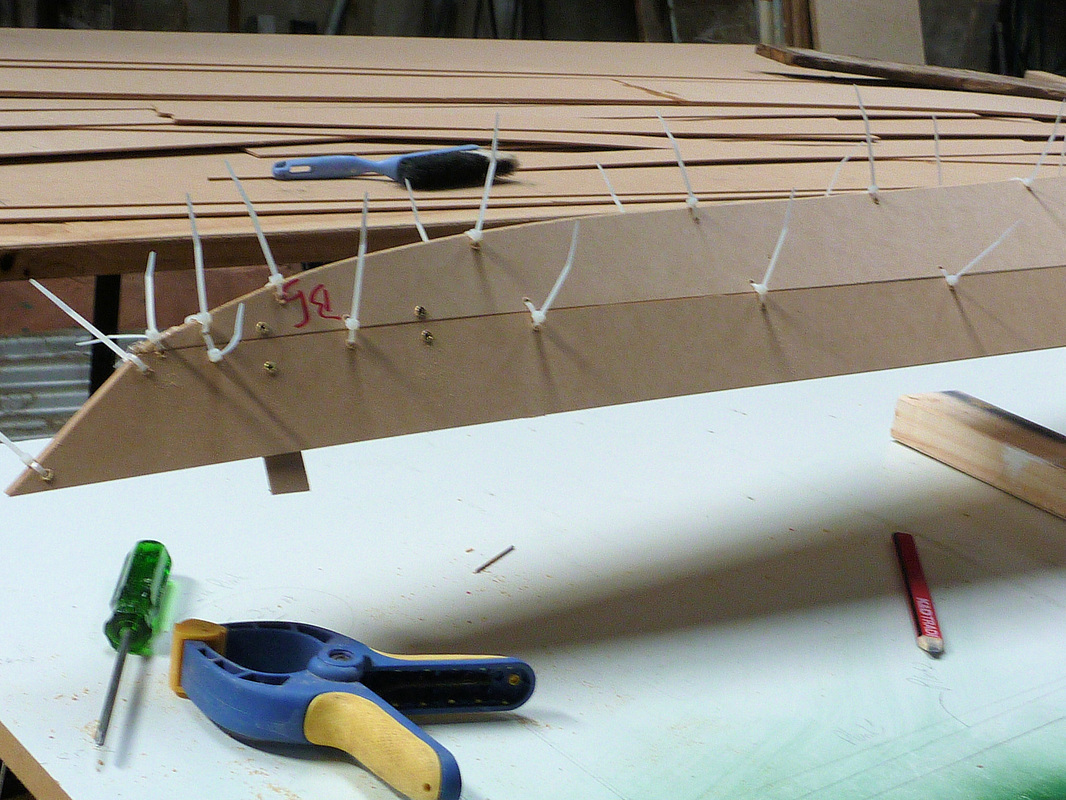
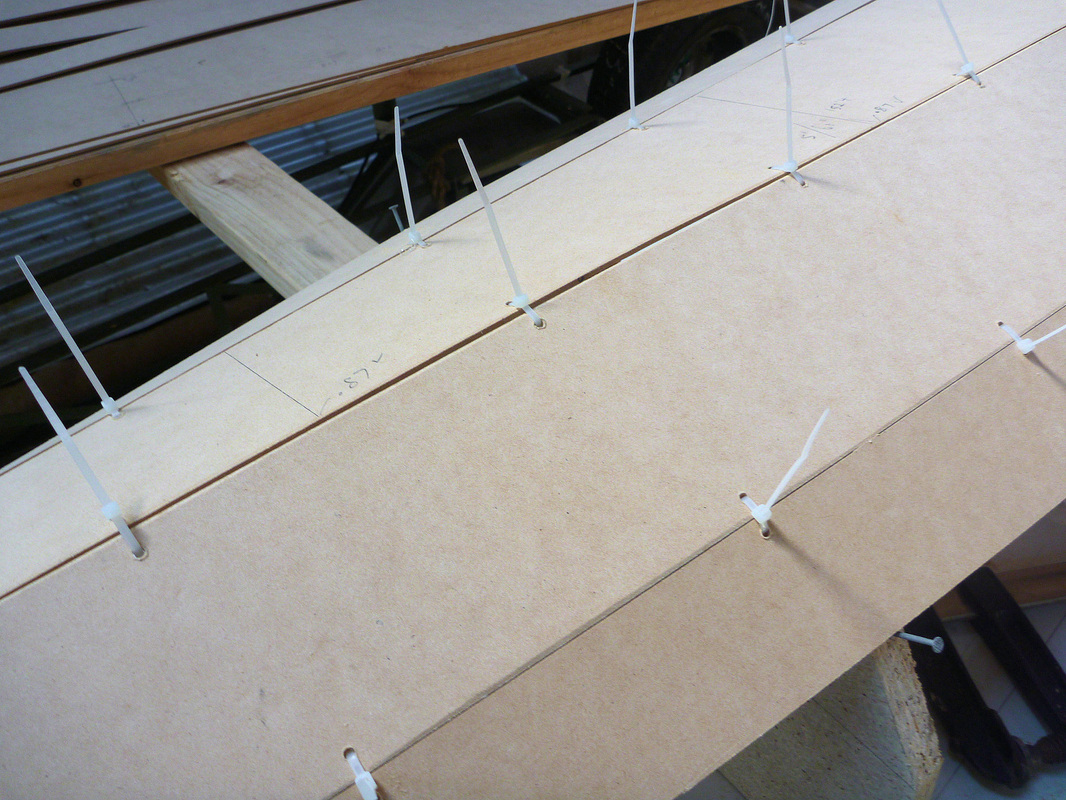
The first lot of cutting was done on cheap MDF, so we could check that the parts were measured and cut correctly. The ends were matched up, all the measurements checked with a Vernier Caliper, and the MDF parts were measured and placed on the 3 particleboard mould shapes. Then they were all 'wired' in place to check placement. The 'wires' are 2.3mm plastic ties used to hold electrical conduit in place. Hot melt glue is also used as a temporary fastener during placement.
I always felt it was just as easy to build two canoes as one. You have to wait for the epoxy to dry, so you might as well repeat the steps on another one rather than waste a day while the epoxy goes off.
According to the plans, we needed 4 sheets of ply (Pic 1) , to build one canoe. And we had to cut it by hand to tolerances of 1/32 inch. This would have been a considerable challenge in the lofting and hand cutting stage, and really not worth the chance of spoiling a lot of expensive plywood. So, I contacted my not so local design Guru - Florin, and he organised some CAD files.
Not only did they convert to CAD, but we could get TWO Kayaks from FIVE sheets of Plywood instead of eight ! To make life even easier, Florin put unique matching shapes at the join lines on each plank, so that the different planks couldnt be confused with each other. He also put small marks on each part, to identify the ply face, and also to allow lining up the two ends of the plank, with a string.
The first lot of cutting was done on cheap MDF, so we could check that the parts were measured and cut correctly. The ends were matched up, all the measurements checked with a Vernier Caliper, and the MDF parts were measured and placed on the 3 particleboard mould shapes. Then they were all 'wired' in place to check placement. The 'wires' are 2.3mm plastic ties used to hold electrical conduit in place. Hot melt glue is also used as a temporary fastener during placement.

The Continuing Story
More Pictures - The Finished Test Hull - Pictures
